The Librato Agent
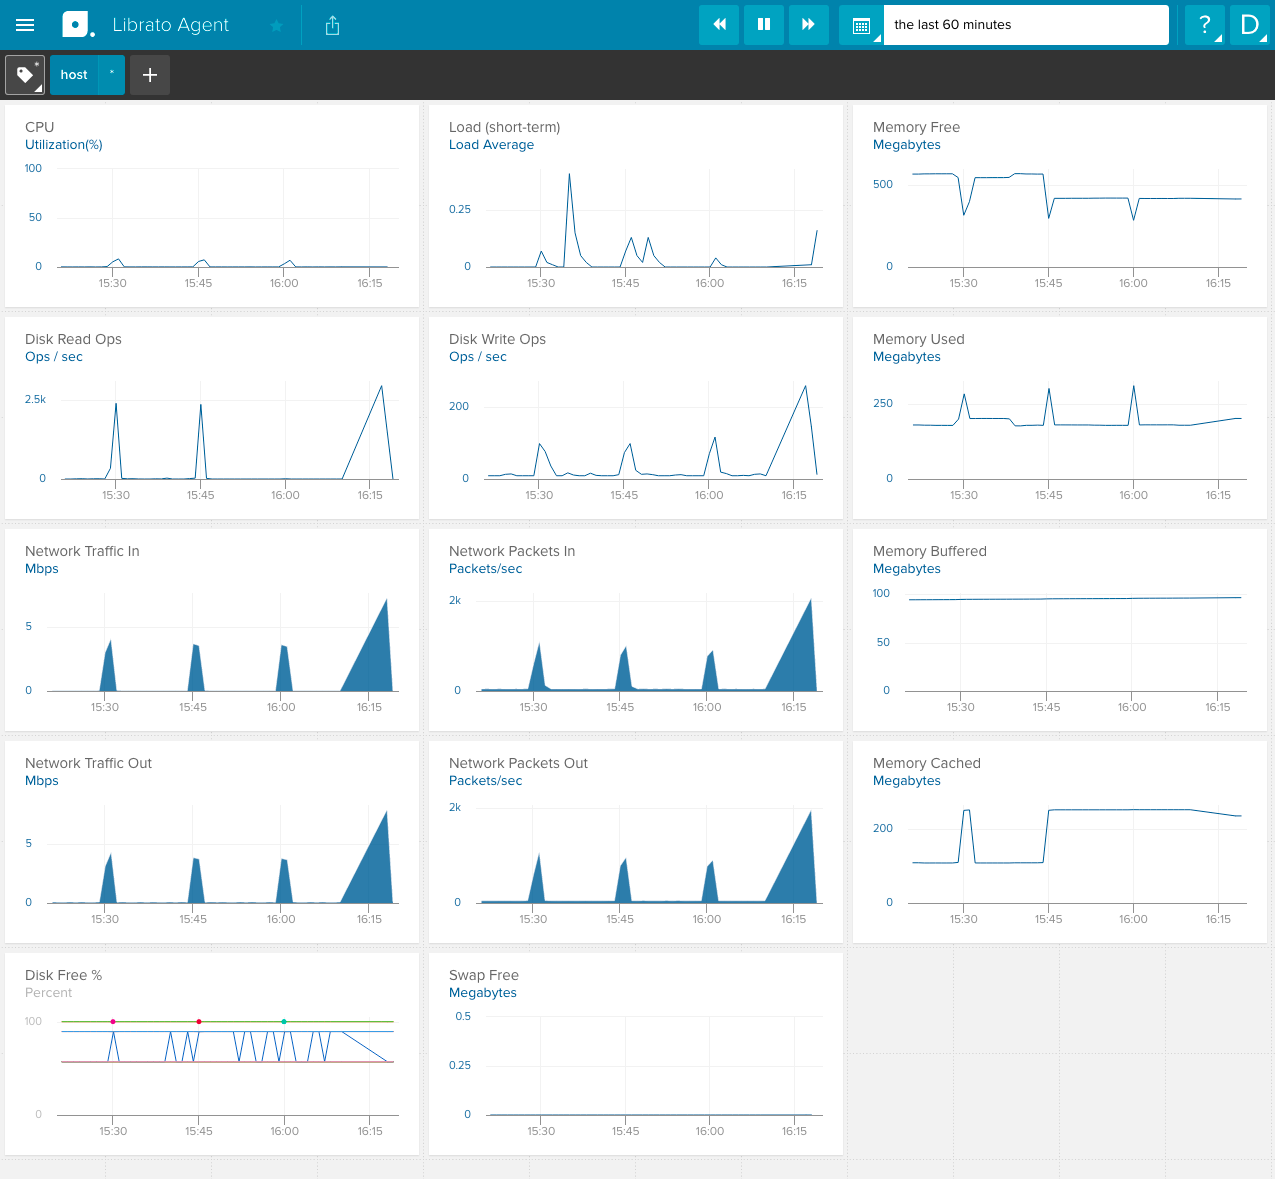
The Librato Agent offers the fastest and easiest way to begin monitoring your networked hosts and services. With an ecosystem of over 90 open source plugins, our agent can collect metrics from almost any services you might be running. Our agent makes it easy to get host and server metrics for all of your systems into Librato with a variety of pre-configured Spaces dashboards, including the following:
Supported Platforms & Release notes
To see the most recent list of supported platforms and services for the Librato Agent, please check our release notes.
Additional Information
Setup
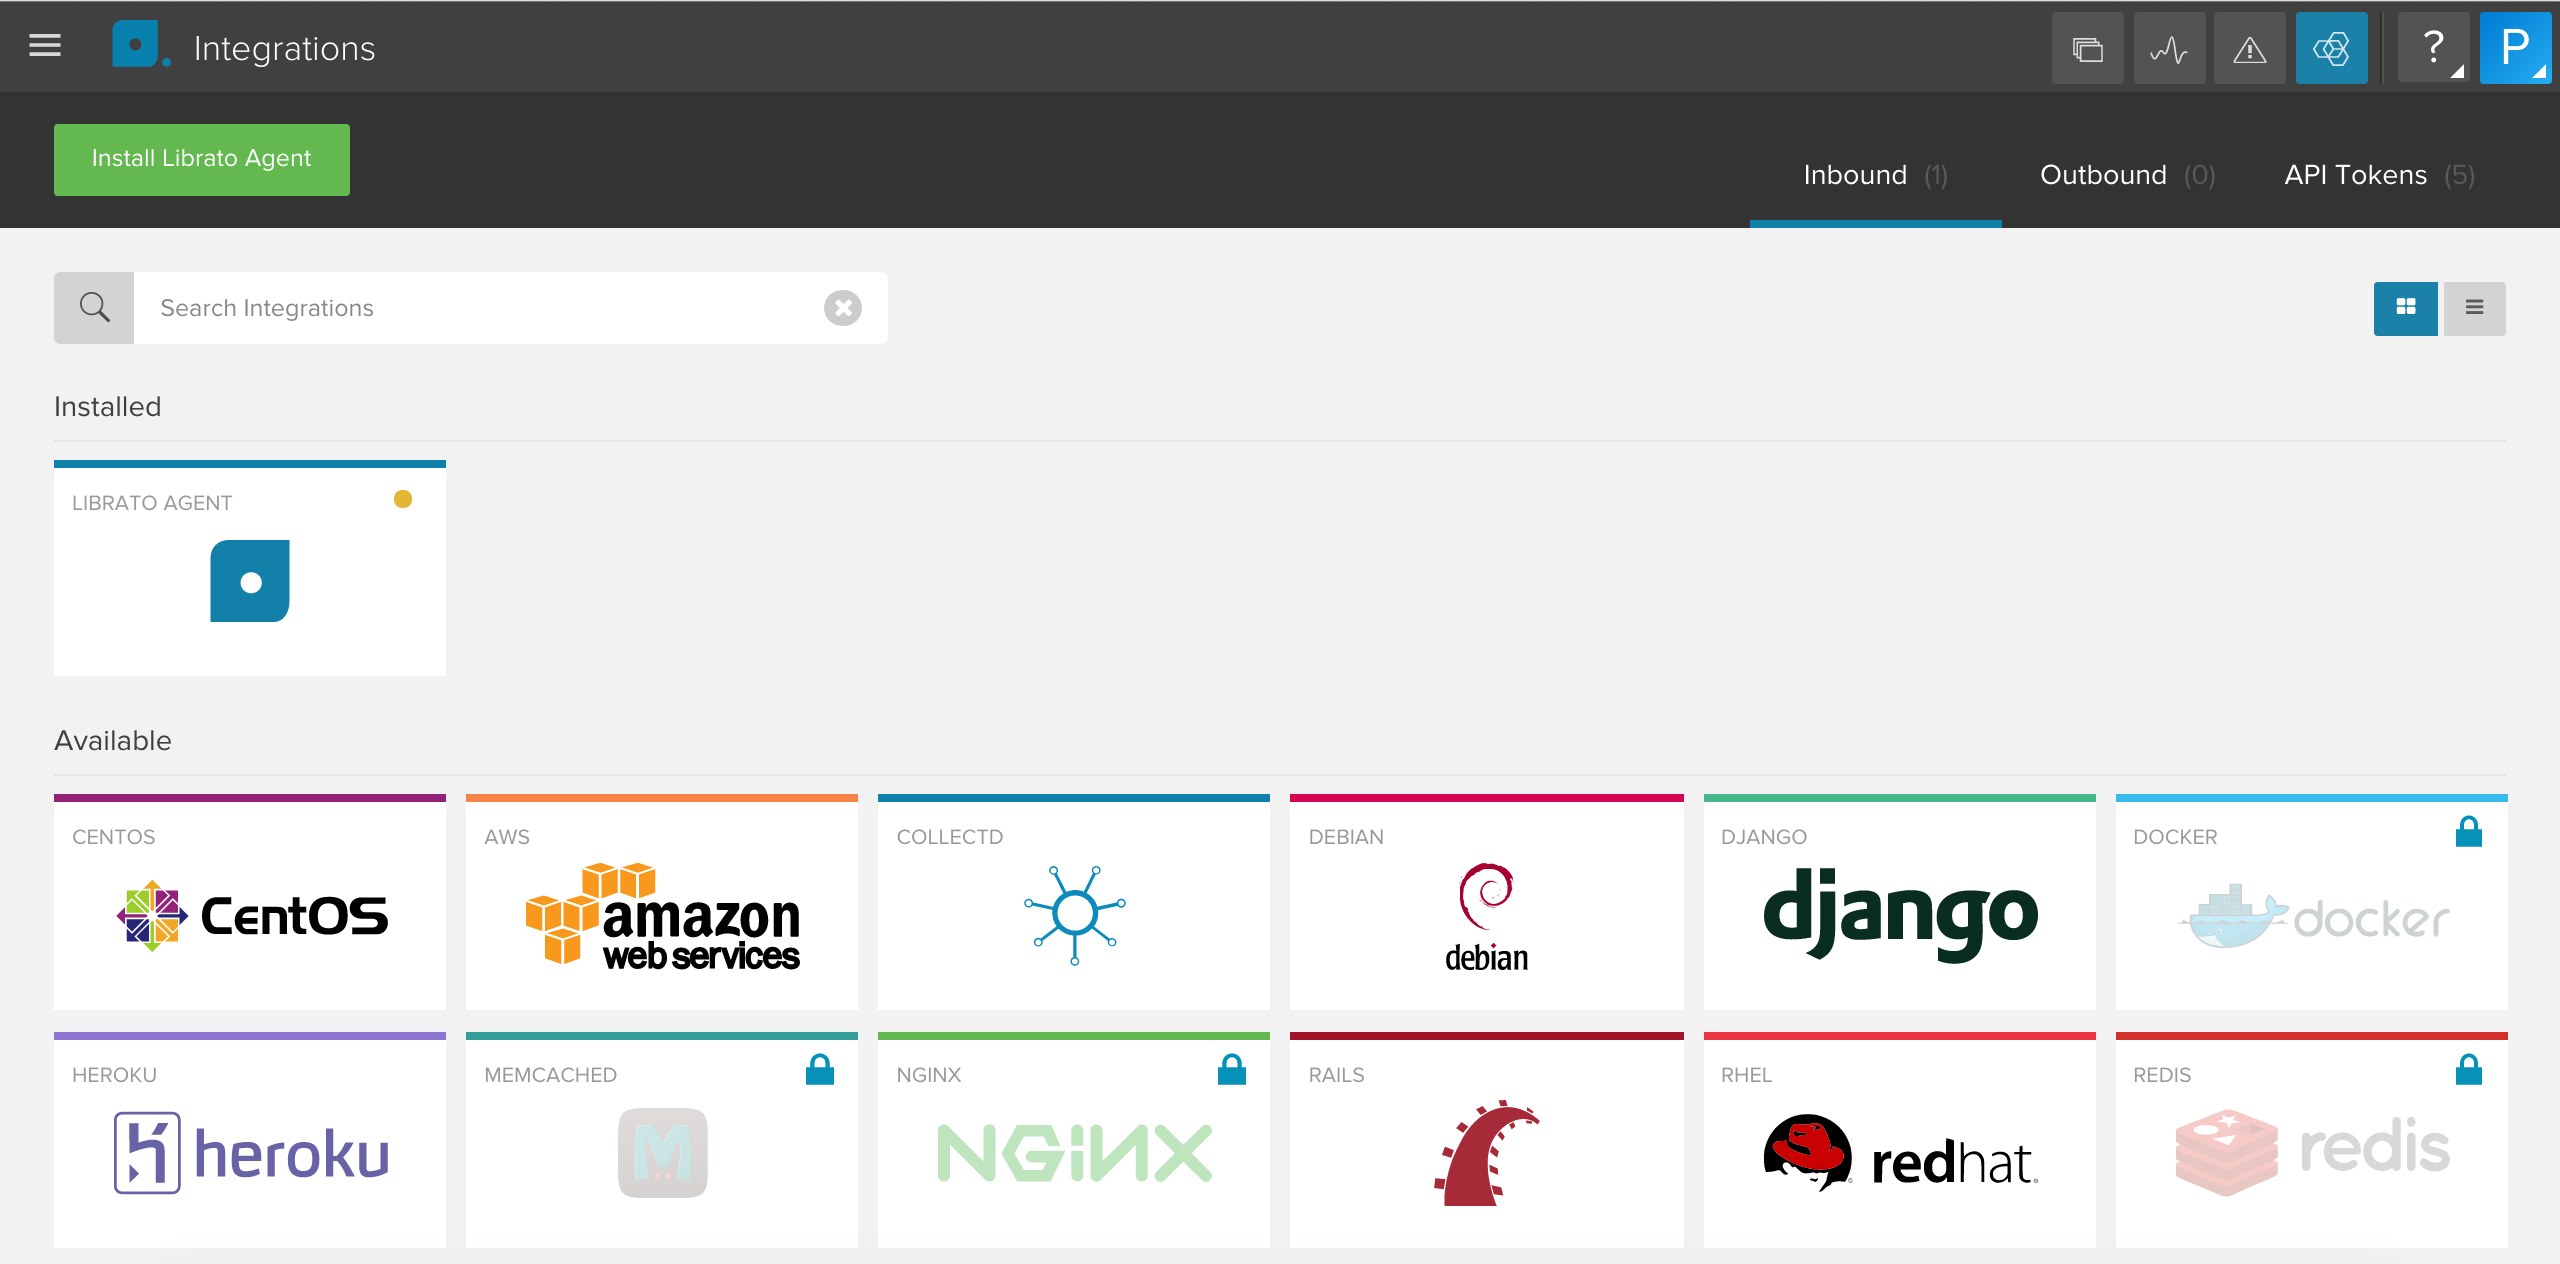
On the integrations page, select Librato Agent to add your Librato Agent integration.

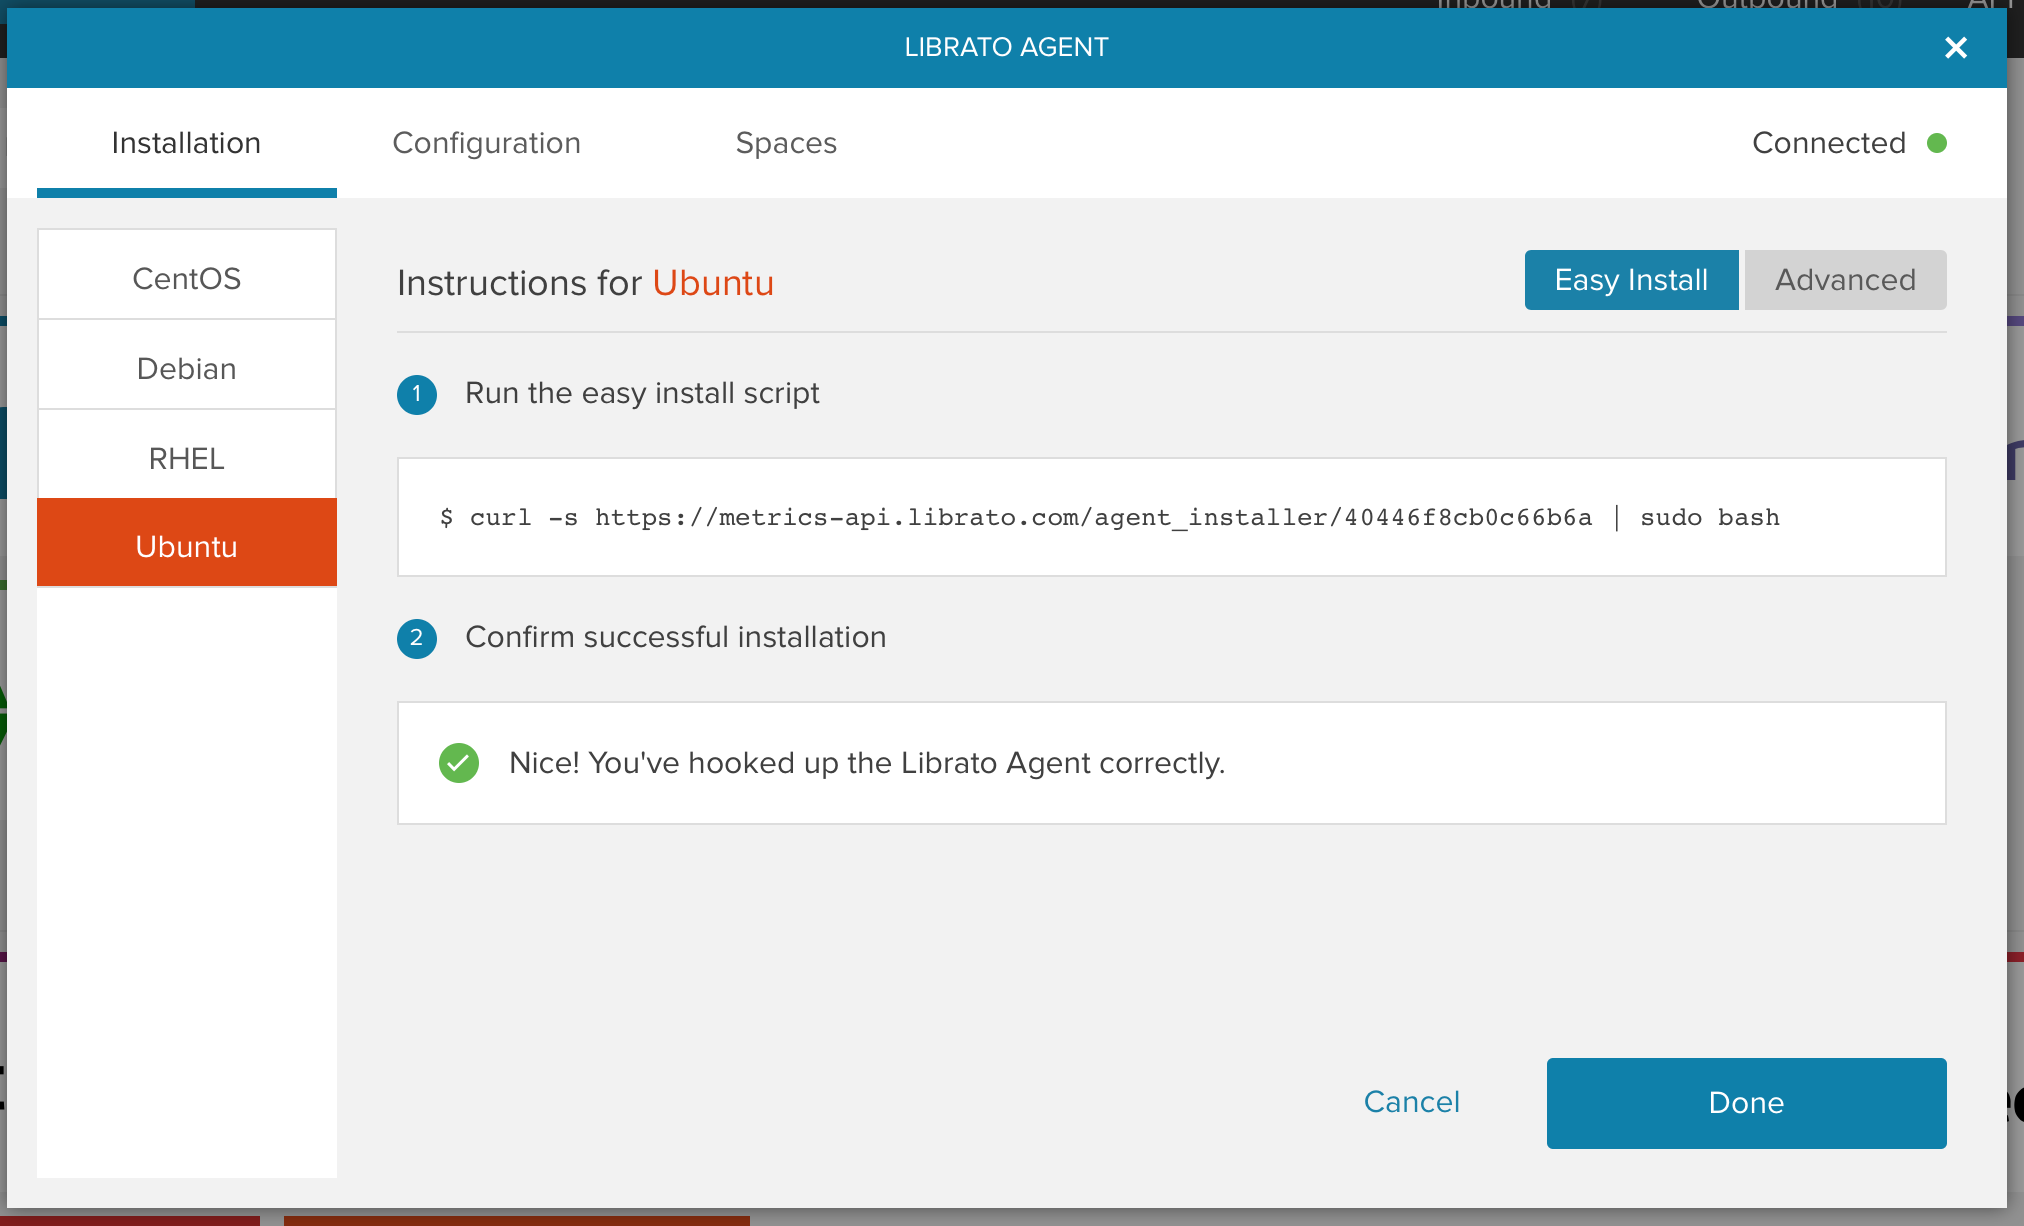
Our easy installer will setup the Librato Agent on your system. Running the provided command will perform the following steps:
- Setup the Librato package repository
- Install the Librato Agent package (our bespoke version of the Collectd agent)
- Configure the Agent with your Librato credentials

Once the installer is finished you should begin seeing metrics from the agent in your Librato account within a few minutes. Metrics will be visible under the librato.* namespace.
Visit your preconfigured Spaces to observe the new metrics as they stream in. You can use our dynamic tag field at the top to filter your view to a subset of metrics. For example, you may want to isolate the view to a specific tier of web servers or even to an individual machine that is behaving badly.

Configuration Management
When managing a large number of servers, a good configuration management tool can make life much easier. Whether you’re using Puppet, Chef, Ansible or Salt, we’ve got you covered. Getting our Librato Agent automatically installed and configured with plugins on each of your hosts is simple.
To get started, below are links to repos with more details on how to utilize each CM tool we currently support:
Installing the Agent Manually
Even though our easy installer provides a seamless out-of-the-box experience for our users, we recognize that many shops will want to integrate the agent installation process into their existing CM pipeline. The following steps will help you get up and running with a minimum of effort.
Instructions for Ubuntu
1. Setup package repository
An apt sources file must be created with the following line. We recommend saving it as
/etc/apt/sources.list.d/librato_librato-collectd.list. Update the release string
(e.g. “trusty”) as needed for your respective systems.
deb https://packagecloud.io/librato/librato-collectd/ubuntu/ trusty main
Dependencies for GPG key verification
$ sudo apt-get install debian-archive-keyring
$ sudo apt-get install apt-transport-https
$ curl https://packagecloud.io/gpg.key 2> /dev/null | sudo apt-key add -
In order to ensure the Agent is installed from our repos instead of upstream OS repos,
you must set an “apt pin”. Create a new file called ‘librato-collectd’ in
/etc/apt/preferences.d/ with the following content.
Package: collectd collectd-core
Pin: release l=librato-collectd
Pin-Priority: 1001
2. Install the Librato Agent
$ sudo apt-get update
$ sudo apt-get install collectd
3. Open collectd.conf for editing
$ sudo $EDITOR /opt/collectd/etc/collectd.conf.d/librato.conf
You will need your Librato account email and token. To find your LIBRATO_TOKEN, go to the integrations page in the Librato app and click on the Librato Agent widget, then navigate to the “Advanced” tab. Copy the LIBRATO_TOKEN and update it and your email in the librato.conf file:
LoadPlugin write_http
<Plugin write_http>
  <Node "librato">
    URL "https://collectd.librato.com/v1/measurements"
    Format "JSON"
    BufferSize 8192

    ######################################################
    #                                                    #
    #     Copy and paste your Librato account email      #
    #     and token, available at:                       #
    #     https://metrics.librato.com/integrations       #
    #                                                    #
    ######################################################
    User "email-you-signed-up-to-librato@example.com"
    Password "LIBRATO_TOKEN"

  </Node>
</Plugin>
Save the file.
4. Restart collectd service
$ sudo service collectd restart
Instructions for Centos
1. Setup package repository
The following snippet should be written out to a yum repository configuration file.
We recommend /etc/yum.repos.d/librato_librato-collectd.repo.
[librato_librato-collectd]
name=librato_librato-collectd
baseurl=https://packagecloud.io/librato/librato-collectd/el/7/$basearch
repo_gpgcheck=1
gpgcheck=0
enabled=1
gpgkey=https://packagecloud.io/gpg.key
sslverify=1
sslcacert=/etc/pki/tls/certs/ca-bundle.crt
Double-check the baseurl line: /el/7/ represents the OS and version. Edit the
version number if necessary and save.
Dependencies for GPG key verification
$ sudo yum install -y pygpgme --disablerepo='librato_librato-collectd'
$ sudo yum install -y yum-utils --disablerepo='librato_librato-collectd'
$ sudo yum -q makecache -y --disablerepo='*' --enablerepo='librato_librato-collectd'
Enable the EPEL repository
$ sudo yum install epel-release
2. Install the Librato Agent
$ sudo yum install -y collectd-5.5.0_librato*
3. Open collectd.conf for editing
$ sudo $EDITOR /opt/collectd/etc/collectd.conf.d/librato.conf
You will need your Librato account email and token. To find your LIBRATO_TOKEN, go to the integrations page in the Librato app and click on the Librato Agent widget, then navigate to the “Advanced” tab. Copy the LIBRATO_TOKEN and update it and your email in the librato.conf file:
LoadPlugin write_http
<Plugin write_http>
  <Node "librato">
    URL "https://collectd.librato.com/v1/measurements"
    Format "JSON"
    BufferSize 8192

    ######################################################
    #                                                    #
    #     Copy and paste your Librato account email      #
    #     and token, available at:                       #
    #     https://metrics.librato.com/integrations       #
    #                                                    #
    ######################################################
    User "email-you-signed-up-to-librato@example.com"
    Password "LIBRATO_TOKEN"

  </Node>
</Plugin>
Save the file.
4. Restart collectd service
$ sudo service collectd restart
Instructions for Amazon Linux
1. Setup package repository
The following snippet should be written out to a yum repository configuration file.
We recommend /etc/yum.repos.d/librato_librato-amazonlinux-collectd.repo.
[librato_librato-amazonlinux-collectd]
name=librato_librato-amazonlinux-collectd
baseurl=https://packagecloud.io/librato/librato-amazonlinux-collectd/el/6/$basearch
repo_gpgcheck=1
gpgcheck=0
enabled=1
priority=1
gpgkey=https://packagecloud.io/gpg.key
sslverify=1
sslcacert=/etc/pki/tls/certs/ca-bundle.crt
Dependencies for GPG key verification
$ sudo yum install -y pygpgme --disablerepo='librato_librato-amazonlinux-collectd'
$ sudo yum install -y yum-utils --disablerepo='librato_librato-amazonlinux-collectd'
$ sudo yum -q makecache -y --disablerepo='*' --enablerepo='librato_librato-amazonlinux-collectd'
Enable the EPEL repository
$ sudo yum install epel-release
$ sudo yum-config-manager --enable epel
2. Install the Librato Agent
$ sudo yum install collectd
3. Open collectd.conf for editing
$ sudo $EDITOR /opt/collectd/etc/collectd.conf.d/librato.conf
You will need your Librato account email and token. To find your LIBRATO_TOKEN, go to the integrations page in the Librato app and click on the Librato Agent widget, then navigate to the “Advanced” tab. Copy the LIBRATO_TOKEN and update it and your email in the librato.conf file:
LoadPlugin write_http
<Plugin write_http>
  <Node "librato">
    URL "https://collectd.librato.com/v1/measurements"
    Format "JSON"
    BufferSize 8192

    ######################################################
    #                                                    #
    #     Copy and paste your Librato account email      #
    #     and token, available at:                       #
    #     https://metrics.librato.com/integrations       #
    #                                                    #
    ######################################################
    User "email-you-signed-up-to-librato@example.com"
    Password "LIBRATO_TOKEN"

  </Node>
</Plugin>
Save the file.
4. Restart collectd service
$ sudo service collectd restart
Instructions for Debian
1. Setup package repository
An apt sources file must be created with the following line. We recommend saving it as
/etc/apt/sources.list.d/librato_librato-collectd.list. Update the release string
(e.g. “jessie”) as needed for your respective systems.
deb https://packagecloud.io/librato/librato-collectd/debian/ jessie main
Dependencies for GPG key verification and HTTPS repositories
$ sudo apt-get install debian-archive-keyring
$ sudo apt-get install apt-transport-https
$ curl https://packagecloud.io/gpg.key 2> /dev/null | sudo apt-key add -
In order to ensure the Agent is installed from our repos instead of upstream OS repos,
you must set an “apt pin”. Create a new file called ‘librato-collectd’ in
/etc/apt/preferences.d/ with the following content.
Package: collectd collectd-core
Pin: release l=librato-collectd
Pin-Priority: 1001
2. Install the Librato Agent
$ sudo apt-get update
$ sudo apt-get install collectd
3. Open collectd.conf for editing
$ sudo $EDITOR /opt/collectd/etc/collectd.conf.d/librato.conf
You will need your Librato account email and token. To find your LIBRATO_TOKEN, go to the integrations page in the Librato app and click on the Librato Agent widget, then navigate to the “Advanced” tab. Copy the LIBRATO_TOKEN and update it and your email in the librato.conf file:
LoadPlugin write_http
<Plugin write_http>
  <Node "librato">
    URL "https://collectd.librato.com/v1/measurements"
    Format "JSON"
    BufferSize 8192

    ######################################################
    #                                                    #
    #     Copy and paste your Librato account email      #
    #     and token, available at:                       #
    #     https://metrics.librato.com/integrations       #
    #                                                    #
    ######################################################
    User "email-you-signed-up-to-librato@example.com"
    Password "LIBRATO_TOKEN"

  </Node>
</Plugin>
Save the file.
4. Restart collectd service
$ sudo service collectd restart
Instructions for Fedora
1. Setup package repository
The following snippet should be written out to a yum repository configuration file.
We recommend /etc/yum.repos.d/librato_librato-collectd.repo.
[librato_librato-collectd]
name=librato_librato-collectd
baseurl=https://packagecloud.io/librato/librato-collectd/el/7/$basearch
repo_gpgcheck=1
gpgcheck=0
enabled=1
gpgkey=https://packagecloud.io/gpg.key
sslverify=1
sslcacert=/etc/pki/tls/certs/ca-bundle.crt
Dependencies for GPG key verification
$ sudo dnf install -y pygpgme --disablerepo='librato_librato-collectd'
$ sudo dnf install -y yum-utils --disablerepo='librato_librato-collectd'
$ sudo dnf -q makecache -y --disablerepo='*' --enablerepo='librato_librato-collectd'
2. Install the Librato Agent
$ sudo dnf install -y collectd-$(sudo dnf list -y collectd-5.5.0* | grep librato | awk '{print $2}')
3. Open collectd.conf for editing
$ sudo $EDITOR /opt/collectd/etc/collectd.conf.d/librato.conf
You will need your Librato account email and token. To find your LIBRATO_TOKEN, go to the integrations page in the Librato app and click on the Librato Agent widget, then navigate to the “Advanced” tab. Copy the LIBRATO_TOKEN and update it and your email in the librato.conf file:
LoadPlugin write_http
<Plugin write_http>
  <Node "librato">
    URL "https://collectd.librato.com/v1/measurements"
    Format "JSON"
    BufferSize 8192

    ######################################################
    #                                                    #
    #     Copy and paste your Librato account email      #
    #     and token, available at:                       #
    #     https://metrics.librato.com/integrations       #
    #                                                    #
    ######################################################
    User "email-you-signed-up-to-librato@example.com"
    Password "LIBRATO_TOKEN"

  </Node>
</Plugin>
Save the file.
4. Restart collectd service
$ sudo service collectd restart
Instructions for RHEL
1. Setup package repository
The following snippet should be written out to a yum repository configuration file.
We recommend /etc/yum.repos.d/librato_librato-collectd.repo.
[librato_librato-collectd]
name=librato_librato-collectd
baseurl=https://packagecloud.io/librato/librato-collectd/el/7/$basearch
repo_gpgcheck=1
gpgcheck=0
enabled=1
gpgkey=https://packagecloud.io/gpg.key
sslverify=1
sslcacert=/etc/pki/tls/certs/ca-bundle.crt
Dependencies for GPG key verification
$ sudo yum install -y pygpgme --disablerepo='librato_librato-collectd'
$ sudo yum install -y yum-utils --disablerepo='librato_librato-collectd'
$ sudo yum -q makecache -y --disablerepo='*' --enablerepo='librato_librato-collectd'
Enable the EPEL repository
$ sudo yum install epel-release
2. Install the Librato Agent
$ sudo yum install -y collectd-5.5.0_librato*
3. Open collectd.conf for editing
$ sudo $EDITOR /opt/collectd/etc/collectd.conf.d/librato.conf
You will need your Librato account email and token. To find your LIBRATO_TOKEN, go to the integrations page in the Librato app and click on the Librato Agent widget, then navigate to the “Advanced” tab. Copy the LIBRATO_TOKEN and update it and your email in the librato.conf file:
LoadPlugin write_http
<Plugin write_http>
  <Node "librato">
    URL "https://collectd.librato.com/v1/measurements"
    Format "JSON"
    BufferSize 8192

    ######################################################
    #                                                    #
    #     Copy and paste your Librato account email      #
    #     and token, available at:                       #
    #     https://metrics.librato.com/integrations       #
    #                                                    #
    ######################################################
    User "email-you-signed-up-to-librato@example.com"
    Password "LIBRATO_TOKEN"

  </Node>
</Plugin>
Save the file.
4. Restart collectd service
$ sudo service collectd restart
Uninstall the Agent
Debian / Ubuntu:
$ sudo apt-get purge --auto-remove collectd
CentOS:
$ yum autoremove collectd
Please let us know what you think about this integration. We would love to incorporate your feedback and any ideas you have on dashboard design into the ongoing development of our integrations.

